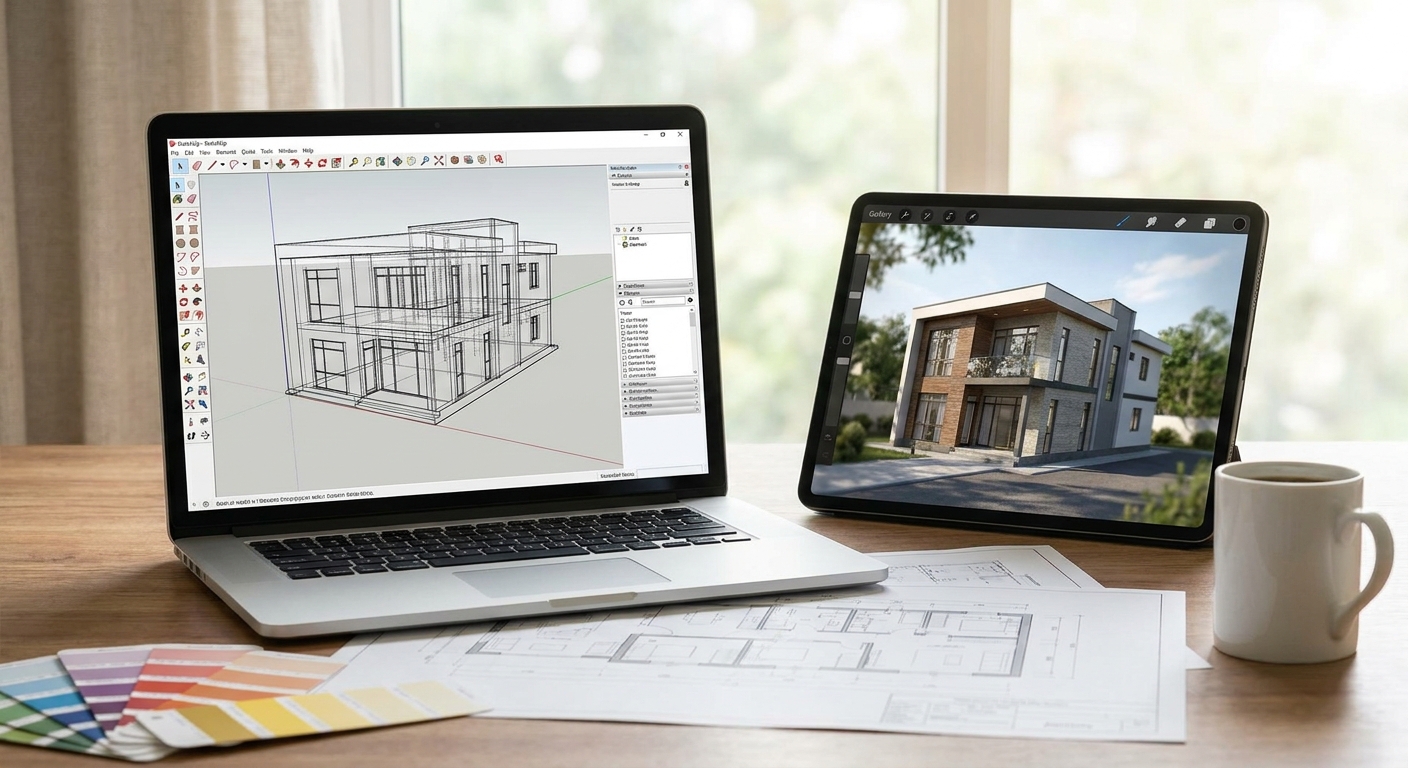
Turning a flat SketchUp, Revit, or Rhino screenshot into a photorealistic render used to mean hours in V-Ray or Lumion. In 2026, AI rendering tools cut that to minutes without touching lighting rigs or material libraries by hand.
- Knowing how to create a rendering in 2026 means exporting a clean screenshot, not a full 3D scene file.
- PromptRender turns SketchUp, Revit, Rhino, Blender, and ArchiCAD screenshots into photorealistic renders without manual lighting setup.
- A render fails most often from bad camera angle or low-res export, not from the AI model itself.
- Budget 10-20 minutes per render including two rounds of prompt refinement.
Why this matters
Clients and reviewers judge a design on the render, not the wireframe. A firm that ships photorealistic visuals in a single afternoon wins more approvals than one that waits a week for a rendering specialist to free up.
Architects and interior designers in 2026 are under more pressure to turn concepts around fast, especially on residential and small commercial jobs where the client wants to see three options before Friday. Learning how to create a rendering directly from your existing 3D software screenshot removes the bottleneck of hiring out or learning a dedicated render engine like V-Ray or Corona.
The workflow below assumes you already have a model in SketchUp, Revit, Rhino, Blender, or ArchiCAD. You are not building a scene from scratch — you are converting what you already made into something a client can picture living in.
What you'll need
- A finished or near-finished 3D model in SketchUp, Revit, Rhino, Blender, or ArchiCAD
- A screen capture tool or your software's native screenshot/export function
- 10-20 minutes of uninterrupted time per render
- An AI rendering tool such as PromptRender to process the screenshot
- A short written description of the desired style (modern, Scandinavian, industrial, etc.)
- A reference image if you want to match a specific material or mood
The steps
1. Clean up the model before you capture anything
Strip out construction lines, temporary dimensions, and any placeholder geometry that shouldn't appear in the final image. AI rendering tools interpret every visible edge and shape in your screenshot, so clutter in the model becomes clutter in the render.
Hide layers you don't need for this specific view. In SketchUp this means toggling the Tags panel; in Revit it's view filters and workset visibility. Common mistake: leaving section cut lines or dimension strings visible — they show up as strange artifacts in the finished render roughly as often as any other input error.
2. Pick the camera angle that sells the space
A three-quarter exterior view or an eye-level interior shot at roughly 1.6 meters (average eye height) reads as natural to a human viewer. Extreme top-down or fisheye angles confuse AI rendering models because they don't match the perspective distribution the model was trained on.
Frame the shot so the focal element — the kitchen island, the facade entry, the living room fireplace — sits in the middle third of the image. Expect to try two or three angles before you land on the one that reads best once rendered.
3. Set basic lighting in your source software
You don't need studio-grade lighting, but you do need directional clarity. Turn on shadows in SketchUp's Shadow settings or enable a sun study in Revit so the screenshot already shows where light falls.
This single step is why some renders in 2026 still look flat: a screenshot with no shadow information gives the AI model nothing to build depth from. Common mistake: rendering at high noon with shadows switched off — the AI has no directional cue and defaults to generic, shadowless lighting.
4. Export at the highest resolution your software allows
A screenshot at 1920x1080 or higher preserves enough detail for the AI model to read material edges, window mullions, and furniture silhouettes accurately. Anything under 1280 pixels wide starts losing the fine geometry that separates a convincing render from a mushy one.
Use your software's native export or print-to-image function instead of a phone photo of your monitor — the difference in usable pixel data is significant enough to affect the final render quality every time.
5. Upload the screenshot and describe the style you want
This is where you actually learn how to create a rendering rather than just a rough visualization. Upload the exported image to PromptRender and add a short prompt describing materials, mood, and time of day — "warm oak flooring, matte black fixtures, late afternoon light."
Specific prompts outperform vague ones. "Modern kitchen" gives you a generic result; "modern kitchen, white oak cabinetry, brushed brass hardware, quartz countertop, golden hour light through east-facing window" gives you something a client recognizes as their project.
6. Review the first pass and refine the prompt
The first output is rarely the final one. Check material accuracy, proportions, and whether the AI preserved the geometry from your original model — furniture that shifts position or windows that resize are signs the prompt needs tightening.
Adjust one variable at a time: swap the material description, change the lighting time, or adjust the mood descriptor. Two rounds of refinement typically gets you from "close" to "client-ready" in under ten minutes total.
7. Export the final render at delivery resolution
Once the render matches your intent, export at the highest resolution the tool offers. Presentation boards, client decks, and marketing pages all demand different minimum sizes, so match your export to the largest use case up front rather than re-rendering later.
Common mistake: exporting a web-resolution image and then trying to print it at 24x36 inches — the pixelation shows immediately and it's a completely avoidable rework.
8. Package the render for delivery
Name the file with the project and view (not "render_final_v3") so clients and team members can find it fast in a shared drive. Bundle multiple angles into one folder if you're delivering a full package rather than a single hero shot.
Render your next model in minutes
Upload a screenshot from SketchUp, Revit, Rhino, Blender, or ArchiCAD and get a photorealistic render back.
Troubleshooting
- The render looks flat with no shadow depth — go back to your source software and enable shadows or a sun study before re-exporting the screenshot.
- Materials come out wrong (wood looks like plastic, stone looks painted) — add explicit material names and finish descriptors to the prompt instead of general terms like "wood" or "stone."
- Geometry looks distorted or warped — check your original screenshot resolution; anything under 1280 pixels wide loses the edge data the AI needs to hold shape accurately.
- The output looks generic, not like your actual project — your prompt is too vague. Add specific fixtures, layout details, or a reference image.
- Windows or furniture shift position from the original model — this happens more often with cluttered screenshots; hide unnecessary layers before capturing.
- Processing takes longer than expected — very high-resolution uploads (above 4K) take longer to process; for quick client previews, a 1920x1080 export is usually sufficient.
Tools and resources
- SketchUp, Revit, Rhino, Blender, or ArchiCAD — your source modeling software
- A screen capture or native export function at 1920x1080 minimum
- PromptRender — converts the exported screenshot into a photorealistic render
- A written style brief (materials, lighting, mood) to guide the prompt
- A shared folder or naming convention for final delivery files
What to do next
Once you've rendered one view successfully, apply the same seven-step process to every angle a client needs — exterior, entry, and the two or three interior shots that carry the most weight in a presentation. Consistency across angles (same lighting time, same material descriptions) matters more to a client's read on the design than any single hero image.
FAQ
How do I create a rendering from a SketchUp model in 2026?
Export a high-resolution screenshot of your SketchUp view, then upload it to an AI rendering tool like PromptRender with a short style prompt describing materials and lighting. Most renders take under 20 minutes including revisions.
What's the best way to render Revit models without V-Ray?
Export a clean screenshot from your Revit view with shadows enabled, then run it through an AI rendering tool that accepts 3D model screenshots directly. This skips the manual lighting and material setup V-Ray requires.
Is AI rendering as good as traditional rendering software in 2026?
For client presentations and concept visualization, AI rendering in 2026 produces photorealistic results in minutes instead of hours. Traditional engines like V-Ray still offer finer manual control for complex animation work.
How much does it cost to create a photorealistic rendering?
Costs vary by tool and volume of renders needed; check current pricing directly with the rendering platform you choose. AI-based tools generally cost less per render than hiring a dedicated rendering specialist.
Can I render a model from Blender or Rhino the same way?
Yes, the same screenshot-to-AI-render workflow applies to Blender, Rhino, ArchiCAD, and Revit exports. The key requirement is a clean, high-resolution screenshot with visible shadow information.
Why does my AI render look distorted or wrong?
Distorted renders usually trace back to a low-resolution screenshot or a cluttered model with visible construction lines. Clean the model, export above 1920x1080, and the geometry issue typically resolves.
How long does it take to render an architectural model with AI?
Most AI renders complete in a few minutes, with total turnaround including prompt refinement landing around 10-20 minutes per view in 2026. Traditional render engines can take hours per frame for comparable quality.
One last thing
The single biggest lever on render quality isn't the AI model — it's the shadow information in your original screenshot. A model exported with sun studies or shadows enabled in SketchUp or Revit consistently outperforms an identical model exported flat, because the AI has actual depth cues to work from instead of guessing. Spend the extra 30 seconds turning on shadows before you export, every time.