
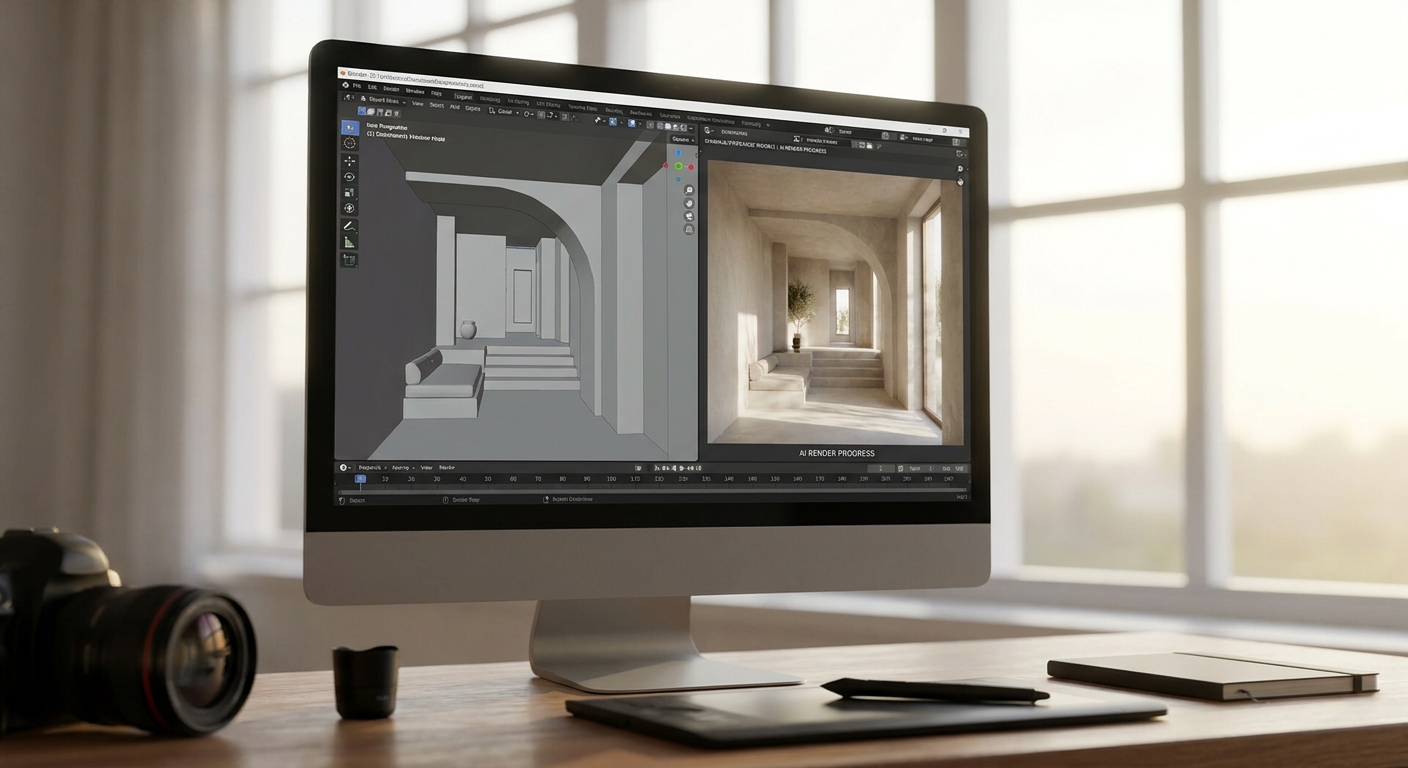
Blender gives you geometry and lighting logic. It doesn't give you photorealism without a render engine, a GPU with hours to spare, and a materials library most freelancers don't have time to build. This guide shows the actual workflow for turning a Blender viewport screenshot into a photorealistic architectural render with an AI render generator, step by step, in 2026.
- PromptRender turns a plain Blender screenshot into a photorealistic render in under a minute — no Cycles or Eevee bake required. Buy the workflow if deadline pressure is real.
- A clean orthographic-free camera angle and a materials-specific prompt matter more than screenshot resolution for blender ai render results.
- Skip full Blender render passes for client previews in 2026 — reserve GPU render time for final deliverables only.
- Iterating on a prompt costs seconds, not the 20-40 minutes a single Cycles pass often takes on a mid-tier GPU.
Why this matters
A Cycles render at production quality can eat 20 to 40 minutes per frame on a consumer GPU, longer with denoising passes and high sample counts. Clients don't wait that long for a mood check on a kitchen layout or a facade option. The blender ai render workflow skips the render engine entirely: you export a screenshot from the viewport, feed it to an AI model trained on photorealistic architectural imagery, and get a finished image back without touching a render farm. In 2026, this is the difference between showing three material options in an afternoon versus one option by end of week.
What you'll need
- A Blender file with your model built and a camera position you like (Solid or Material Preview shading is enough — you don't need a rendered viewport)
- A viewport screenshot exported as PNG or JPG at a reasonable resolution (1920x1080 or higher holds up better)
- A PromptRender account with render credits available
- A short written description of the materials, lighting, and mood you want in the final image
- 5-10 minutes per image, most of it spent refining the prompt rather than waiting on output
The steps
1. Frame the shot before you export anything
Camera angle is the single biggest lever on the outcome, and it's the one thing the AI can't fix for you. Set your Blender camera to a human eye-level height for interiors (roughly 1.5-1.7m) and a slight three-quarter angle for exteriors — dead-on front elevations read as flat and technical, not photographic. Avoid extreme wide-angle lenses under 18mm equivalent; they distort proportions in ways that carry straight through to the AI output. Common mistake: using the default Blender camera FOV, which tends to be wider than what a real photographer would shoot, making rooms look stretched.
2. Export a clean screenshot, not a rendered image
Switch to Solid or Material Preview shading mode and take a viewport screenshot — you don't need Cycles or Eevee to render anything first. This is the step that saves the 20-40 minutes mentioned above. Make sure the screenshot is free of Blender's UI chrome (toolbars, gizmos, grid overlay) since stray interface elements confuse the model's read of the scene. Common mistake: exporting with the grid floor visible, which the AI sometimes interprets as a literal checkerboard pattern in the final render.
3. Upload the screenshot to PromptRender
Drop the file into PromptRender and confirm the geometry reads correctly — walls, windows, and furniture placement should be recognizable even in a flat gray Blender shading pass. This step takes seconds, but it's worth a visual double-check before you spend a render credit. If the model looks cluttered or key elements are out of frame, go back to Blender and reframe rather than trying to fix it with prompt text alone.
4. Write a materials and lighting prompt, not a mood board
This is where blender ai render results separate from generic AI image generation. Instead of writing "make it look nice," specify materials by name: "white oak flooring, matte black steel window frames, honed concrete counters, warm 3000K interior lighting, golden hour sun through south-facing windows." The more your prompt reads like a materials schedule and a lighting plot rather than an adjective list, the closer the output tracks to something a client could actually specify and build. Common mistake: writing prompts under 10 words — vague input produces generic output almost every time.
5. Set render style and resolution before generating
Choose a photorealistic style setting appropriate to the project type — residential interiors and commercial exteriors often call for different lighting defaults. Pick an output resolution that matches where the image is going: social or quick client preview doesn't need the same file size as a print board. Generating at a lower resolution first to check composition, then re-running at full resolution once the prompt is locked, saves credits without sacrificing the final deliverable.
6. Generate and review against the brief, not against your own taste
Run the render and check it against three things: does the material palette match what was discussed, does the lighting direction make physical sense for the stated time of day, and are proportions consistent with the Blender model. A render can look beautiful and still be wrong if the client asked for warm wood tones and got cool gray. Common mistake: approving the first output because it looks impressive, then discovering in the client meeting that the flooring material is wrong.
7. Iterate on the prompt, not the whole workflow
If the first pass misses the mark, adjust the specific line in the prompt that's off — swap "warm 3000K" for "neutral 4000K" if the lighting reads too orange, or change "matte" to "brushed" if a metal finish looks too reflective. Each iteration takes seconds, which is the entire point of skipping traditional render engines for exploration phases. Three or four prompt passes in 2026 workflows typically cost less total time than one Cycles render at final quality settings.
8. Export the final high-res render for delivery
Once the prompt is dialed in and the client-facing material choices are locked, generate at full resolution for the deliverable file. Keep the original Blender file and the winning prompt text together in your project folder — if the client requests a variation later (different season, different time of day), you're re-running a known-good prompt rather than starting from scratch.
Turn your Blender scene into a render
Upload a screenshot, describe the materials, generate in seconds.
Troubleshooting
- Output looks generic or stock-photo-like. Your prompt is too short or too vague. Add specific material names, exact lighting conditions, and a time of day rather than adjectives like "nice" or "modern."
- Furniture or architectural elements are missing from the final render. The original screenshot likely had those elements out of frame or occluded by the Blender viewport gizmo. Re-export with a cleaner camera angle.
- Materials don't match what you specified. Be more literal — "white oak" reads more consistently than "light wood," and "honed concrete" reads more consistently than "gray floor."
- Lighting direction looks physically wrong for the stated time of day. Check your Blender scene's window and door orientation before uploading; the AI follows the geometry's actual light logic, so a north-facing window won't produce convincing golden hour light no matter what the prompt says.
- Image looks distorted or stretched. This traces back to camera FOV in Blender, not to the AI generation step. Reset to a standard 35-50mm equivalent lens before re-exporting.
- Render credits running out faster than expected. Generate at lower resolution during the exploration phase, and only run full-resolution passes once the prompt and material list are finalized.
Tools and resources
- Blender (any recent version with viewport shading modes) for the base model and camera setup
- PromptRender for the AI conversion step
- A written materials list per project — treat it like a spec sheet, not a mood description
- If you're coming from SketchUp instead of Blender on other projects, the SketchUp to photorealistic render workflow covers the same process with SketchUp-specific export settings
What to do next
Run this workflow on one real project screenshot before committing to it for client deliverables — the first prompt rarely nails materials on the first try, and it's worth learning your own prompt vocabulary on a low-stakes scene first. Once you've got a prompt structure that consistently produces usable output, save it as a template and swap material names per project rather than rewriting from zero each time.
FAQ
Can you use Blender with AI rendering tools in 2026?
Yes — a plain viewport screenshot from Blender, exported in Solid or Material Preview shading, is enough input for an AI render generator like PromptRender to produce a photorealistic image. You don't need to run a Cycles or Eevee render pass first.
Is blender ai render faster than a traditional Cycles render?
Yes, substantially. A production-quality Cycles render can take 20-40 minutes per frame on a mid-tier GPU, while an AI-generated render from a screenshot typically returns results in under a minute.
Do I need a rendered Blender scene before using PromptRender?
No. A flat-shaded viewport screenshot with clean geometry and no UI overlays works better than a partially rendered pass, since stray render artifacts can confuse the AI's read of the scene.
What resolution should my Blender screenshot be?
1920x1080 or higher holds up best for a photorealistic render. Lower resolutions still work for quick composition checks but lose detail in the final output.
How much does it cost to convert a Blender model into a photorealistic render?
Cost depends on your render credit plan and the resolution you generate at in 2026 — generating at lower resolution during exploration and full resolution only for the final deliverable stretches credits further.
Can I use the same workflow for SketchUp models?
Yes, the same screenshot-to-AI-render process works for SketchUp, Revit, Rhino, and ArchiCAD files, with software-specific export steps for each.
Why does my AI render not match the materials I described?
Vague prompt language is the most common cause. Naming materials specifically, such as "honed concrete" instead of "gray floor," produces more consistent results.
Does camera angle in Blender affect the final AI render quality?
Yes, more than almost any other input. A human eye-level camera at a three-quarter angle produces photographic results; extreme wide-angle lenses distort proportions that carry through to the finished render.
One last thing
The screenshots that produce the best blender ai render results in 2026 are almost never the most detailed ones — a low-poly Blender scene in flat Solid shading with a well-framed camera and a specific materials prompt regularly outperforms a half-finished Cycles render with textures baked in. Geometry and framing do the heavy lifting; let the AI handle the photorealism.