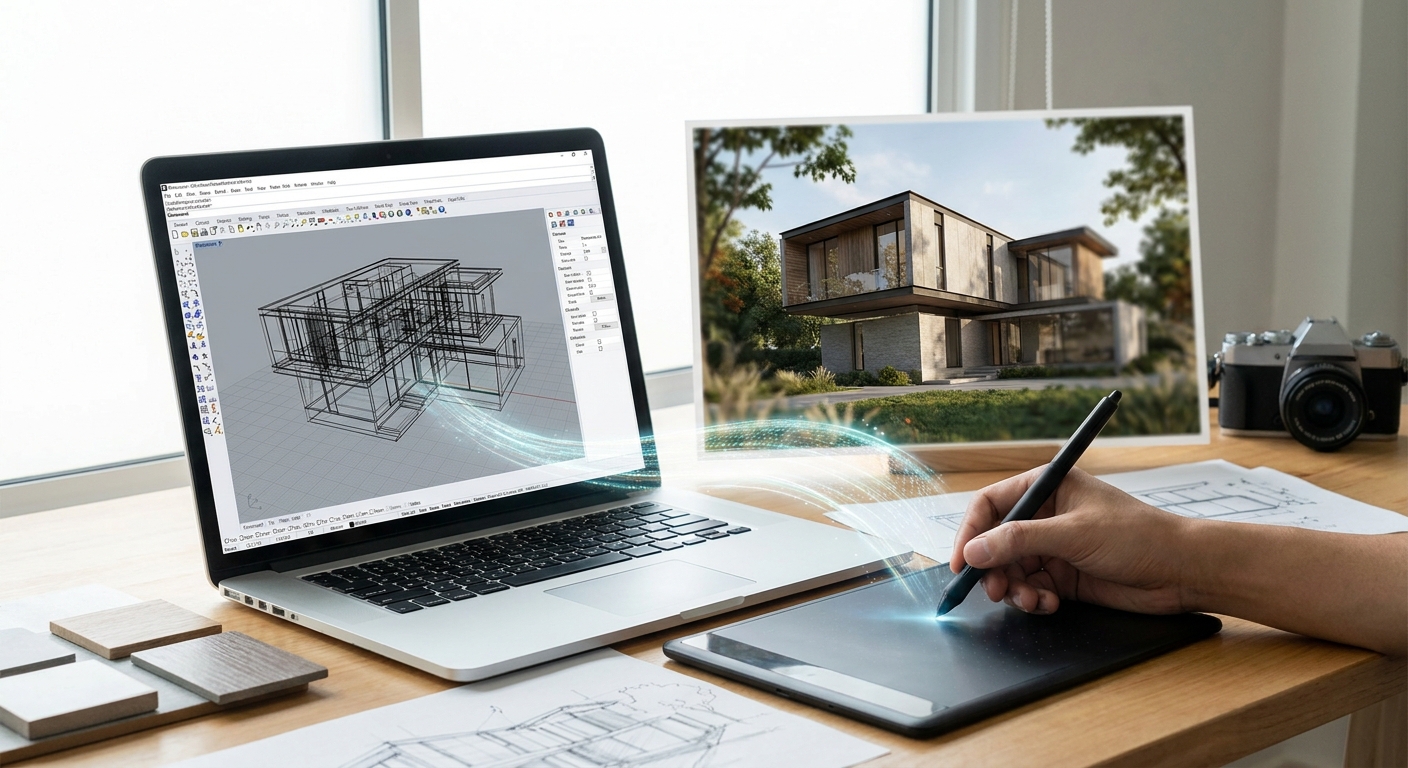
Rhino models render fast in the viewport but slow to photorealistic in traditional engines — this guide gets you from a Rhino screenshot to a client-ready render in minutes, not hours.
- A Rhino AI render starts with a clean viewport screenshot, not a raw .3dm export — geometry cleanup matters more than software choice.
- PromptRender turns a Rhino screenshot into a photorealistic render in seconds once materials and lighting are described in plain text.
- Perspective view at 1920px or wider gives the AI enough detail to read depth, glass, and reflections correctly.
- Regenerating with a sharper materials prompt fixes most flat or plastic-looking Rhino AI renders — buy the workflow, skip the plugin stack.
Why this matters
Rhino is a modeling tool, not a rendering engine, and most studios still bolt on V-Ray, Enscape, or Cycles for Rhino to get photoreal output. That adds licensing cost, GPU time, and a learning curve most junior staff don't have hours to spend on in 2026.
A rhino ai render workflow skips the render engine entirely. You capture the model, describe the materials and light, and let the AI fill in the physically-based detail — no render farm, no overnight batch queue.
What you'll need
- Rhino 7 or Rhino 8 (Windows or Mac), model fully modeled with closed surfaces where possible
- A display mode set to Shaded or Rendered — never Wireframe — for the screenshot
- A PromptRender account for the upload-describe-generate step
- 5-10 minutes per view, plus a couple of minutes per regenerate
- A short written description of materials, time of day, and mood for each shot
The steps
1. Clean up your Rhino geometry first
Hide construction lines, unused layers, and any dimension annotations before you touch the camera. A rhino ai render reads exactly what's on screen, so leftover guide curves or naked edges show up as artifacts in the output.
Run Check in Rhino to catch open edges on anything meant to look solid, like glazing panels or furniture. This step takes two minutes and prevents most of the weird floating-line artifacts people blame on the AI later.
Common mistake: leaving grid lines or axis markers visible in Shaded mode — they render as ghost lines in the final output.
2. Set your camera angle in Perspective view
Switch to Perspective, not Parallel — orthographic views flatten depth cues the AI needs to place light and shadow correctly. Use Named Views to lock a framing you can return to for revisions.
Aim for a focal length around 35-50mm equivalent and keep the horizon roughly in the lower third of the frame for exterior shots. Interior shots benefit from a slightly wider angle, closer to 24-28mm, to show more of the room without distortion.
Common mistake: capturing a top-down or dead-flat elevation view and expecting a photoreal result — the AI has nothing to build depth from.
3. Switch display mode and capture the screenshot
Set the viewport to Rendered or Shaded, hide the grid (press G), and maximize the viewport before capturing. Export at 1920x1080 or larger — anything smaller and the AI has too little detail to resolve materials like glass, wood grain, or metal.
Use Rhino's ViewCaptureToFile command instead of a plain screen grab. It captures the full viewport without OS chrome or toolbars bleeding into the frame.
Expected outcome: a clean PNG or JPG with no UI elements, no wireframe lines, and enough resolution to zoom in without pixelation.
4. Upload the screenshot to PromptRender
Open PromptRender and upload the Rhino screenshot. The workflow is three steps — upload, describe, generate — with no plugin install and no render engine license required.
This is where the model geometry stops mattering and the material description takes over. PromptRender reads the massing and lighting cues from your screenshot and rebuilds the surfaces as photoreal materials based on what you type next.
5. Write a specific materials and lighting prompt
Name the actual materials instead of describing style. "Board-formed concrete, white oak cladding, black steel window frames, soft overcast daylight from the north" gives the AI far more to work with than "modern minimalist house."
Include a time of day and light quality every time — "golden hour, low sun angle, warm rim light" changes the shadow direction and color temperature completely versus "overcast midday." A rhino ai render is only as specific as the prompt behind it.
6. Generate and check the first pass
Generation runs in seconds, not the minutes-to-hours typical of Cycles or V-Ray batch renders. Check three things on the first pass: material accuracy, shadow direction matching your described light, and edge cleanliness where glazing meets frame.
If the massing and composition are right but materials read wrong, that's a prompt fix, not a Rhino fix — go back to step 5 before you touch the model again.
Common mistake: judging the first pass at thumbnail size. Zoom in on glazing, corners, and any thin structural elements before deciding it needs a redo.
7. Regenerate with a sharper prompt
Each regenerate uses one render credit, so tighten the prompt before you burn a second pass. Swap vague adjectives for material names and add one lighting detail you didn't specify the first time, like "soft bounce light off the concrete floor."
Most flat or plastic-looking first passes fix in one regenerate once the materials are named explicitly instead of implied.
8. Export the final render for presentation
Once the render matches the brief, export at the highest resolution PromptRender offers for that credit tier. For client decks, pull both a full-frame version and a couple of tight crops on key details like entry canopies or material transitions — reviewers respond to the close-up more than the wide shot.
Turn a Rhino screenshot into a render
Upload, describe materials and light, generate in seconds.
Troubleshooting
- Render looks flat with no depth — the source screenshot was Parallel/orthographic, not Perspective. Recapture from a perspective camera.
- Glass or glazing renders opaque — the prompt never named the material. Add "clear glazing, subtle reflection" explicitly.
- Floating lines or artifacts in the output — leftover construction geometry or an open edge in the Rhino model. Run Check and hide guide curves before recapturing.
- Output looks blurry or soft — screenshot resolution was under 1920px wide. Recapture at full viewport size with ViewCaptureToFile.
- Lighting direction doesn't match the brief — the prompt described mood but not sun position. Add a specific time of day and light direction.
- Rhino's own Cycles render looks nothing like the AI output — expected. Cycles is a physically simulated engine; a rhino ai render workflow interprets your description on top of the screenshot, not a light simulation. Use them for different jobs, not as substitutes for each other.
Tools and resources
- Rhino's Rendered or Shaded display mode, never Wireframe, for source captures
- ViewCaptureToFile command for clean, UI-free screenshots
- Named Views panel to lock and reuse camera angles across revisions
- PromptRender for the upload-describe-generate render step
- A short written materials-and-lighting brief per view, kept as a reusable template for repeat shots
What to do next
If your studio also works in SketchUp alongside Rhino, the same upload-describe-generate workflow applies with a few SketchUp-specific capture settings — see how to turn SketchUp models into photorealistic renders for the export settings that matter on that side.
FAQ
What is a Rhino AI render?
A Rhino AI render is a photorealistic image generated from a Rhino viewport screenshot using AI, instead of a traditional render engine like V-Ray or Cycles. You capture the model, describe materials and lighting in text, and the AI produces the finished image in seconds.
Can PromptRender render directly from a Rhino .3dm file?
No — PromptRender works from a screenshot of your Rhino viewport, not the raw 3D file. Capture the view in Shaded or Rendered display mode at 1920px or wider, then upload that image.
How long does an AI render take compared to V-Ray or Cycles?
A rhino ai render generates in seconds once uploaded, versus minutes to hours for a traditional engine pass at high sample counts. The tradeoff is that AI renders interpret your prompt rather than simulate light physics exactly.
Do I still need Enscape or V-Ray if I use AI rendering?
Not for still images meant for presentations or marketing. Studios still reach for Enscape or V-Ray for real-time walkthroughs or physically accurate lighting studies, since those require simulated light rather than a described scene.
Is an AI render good enough for client presentations in 2026?
Yes, for still images and concept decks — the format most client reviews actually use. For lighting-critical technical studies, a simulated render engine is still the right tool.
How much does a Rhino AI render cost?
Cost depends on the render credit plan you're on — check current pricing on PromptRender's site before budgeting a project. Regenerating a pass to fix materials or lighting uses an additional credit.
What resolution should my Rhino screenshot be?
Capture at 1920x1080 or larger using ViewCaptureToFile in Rhino. Lower resolutions leave the AI too little detail to resolve fine materials like glass and wood grain.
Does this workflow work on Rhino for Mac?
Yes — the screenshot-based workflow works the same on Rhino for Mac and Rhino for Windows, since the AI only reads the exported image, not the native file format.
One last thing
Most bad Rhino AI renders trace back to the screenshot, not the AI. A model with open edges, a flat orthographic camera, or a 1200px capture will underperform no matter how good the materials prompt is — fix the capture first, then chase the prompt.